Wood Porch Railing Installation Instructions
Our Wood Porch Balustrade systems have undergone significant improvement in 2018. An improved Rail Installation Hardware Kit and a wider baluster capacity for the 4″ System are some of the features. And, the balustrades have been independently tested as Structural Guardrail. They have been found to exceed the strength requirements for IBC, IRC, and ASME building codes. This testing covered not only our Rail Systems, but also the Rail Installation Hardware Kit, the Newel Posts, and the Newel Post Installation Hardware Kits as well. We have developed new Wood Porch Railing Installation Instructions to reflect these improvements.
For a downloadable/printable version to take with you to the jobsite, click Wood Balustrade Install Instructions PDF.
Newel Post Installation
For easiest installation and best results, use our Newel Installation Kit.
NOTE: We recommend all products are primed BEFORE installation. Factory priming is available.
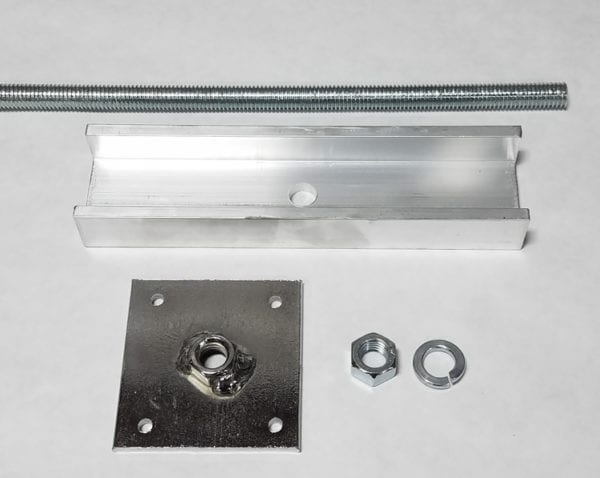
- Mark the center locations of all the newels on porch floor/decking. Fasten the Anchor Plate to your flooring
- Wood Floor: We recommend 3” of structural wood flooring (2 layers of 2×6, for example) for fastening newels. Bolts through the material are better than lags. Use exterior grade bolts appropriate to your substrate, minimum ¼” dia.
- Concrete/Masonry Floor: Pre-drill the four holes with a masonry bit and hammer drill. Fasten anchor plate with four masonry screws/anchors.

- Install threaded rod into anchor plate, snug down with pliers.
- Place the newel over threaded rod. Place the Top Channel over the rod and down into the recess in the top of the newel, open side up. Secure with lock washer and nut and tighten.
- Install cap with construction adhesive and/or brad nails.
Rail Installation
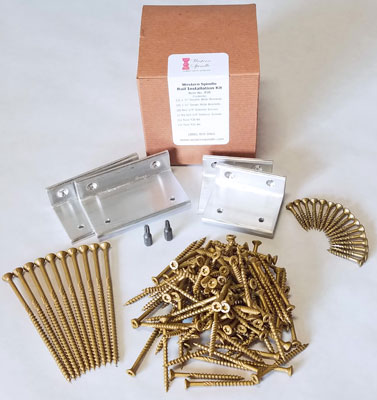
For easiest installation and best results, use our Rail Installation Kit. One kit per complete (top and bottom) rail section.
- With newel posts (or columns, etc.) installed, measure distances between them and cut rail sections to length.
- Rabbet the underside of the Sub-rail ends so that the bracket fits flush. Do the same to the Skirt ends (4-pc. System) or bottom rail (3-pc. System).
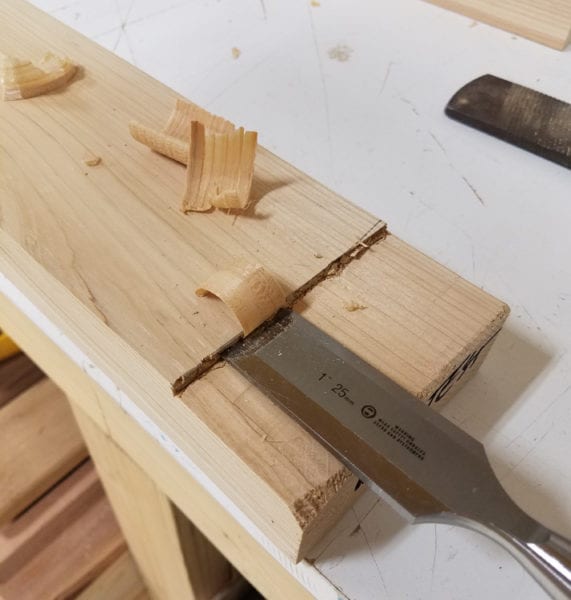
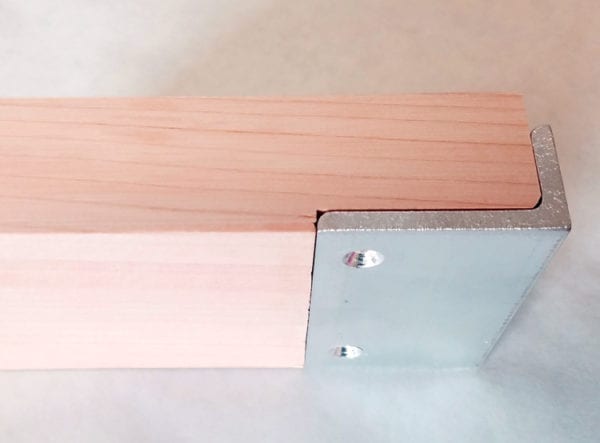
NOTE: with the 6” class 3-pc. System, you’ll need to mortise a notch for the bracket to fit into the bottom rail because it is narrower than the rail. For the 4” class 3-pc. System, DO NOT mortise the underside of the bottom rail, because the bracket is only slightly narrower than the rail. A mortise on the 4” class Bottom Rail could cause the sides of the rail to split. The 4” class 3-pc. Bottom Rail simply sits on top of the bracket.
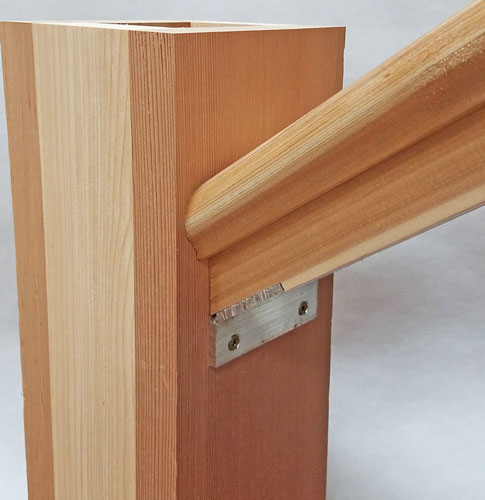
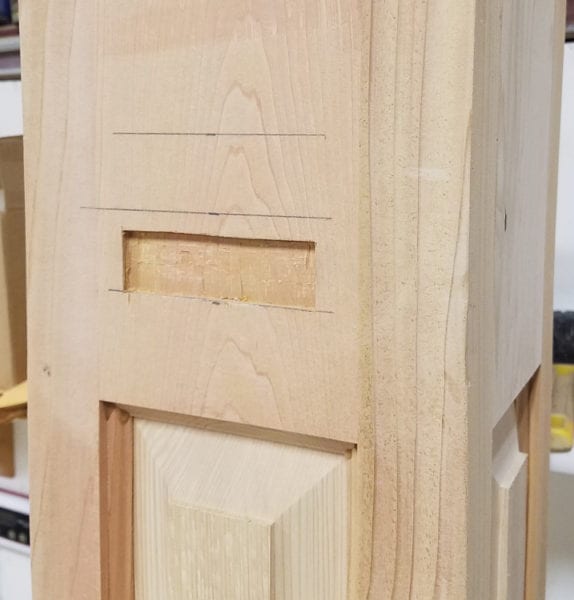
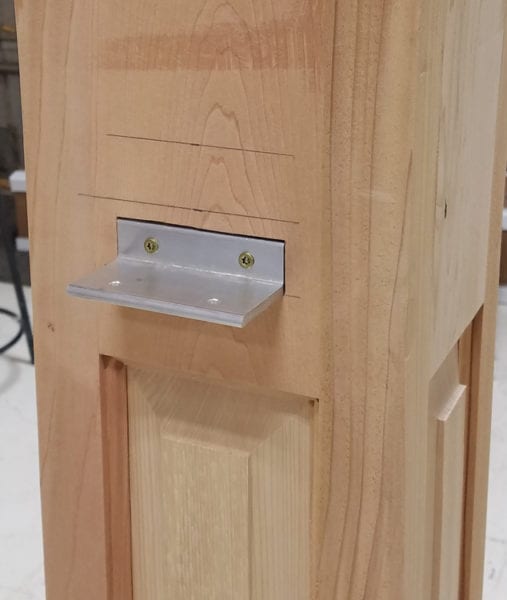
HINT: for an easier/quicker install and where the underside of the rails will not be noticeable, you can skip the rabbeting and simply place the rails on top of the brackets. - Locate where the top and bottom brackets will be on the newel post. The shorter leg of the angle brackets go against the post.
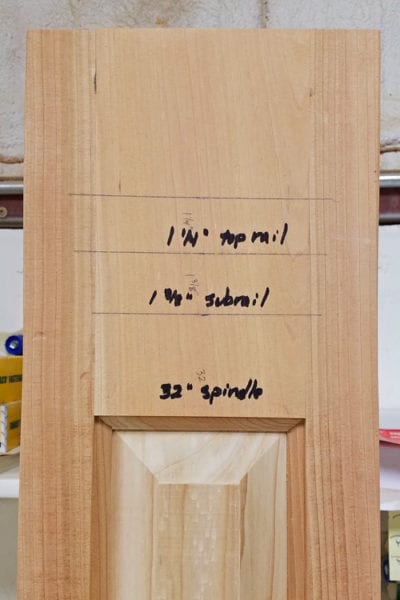
- (4-pc. & 3-pc. Systems) The top brackets are located at the bottom of the Sub-rail.
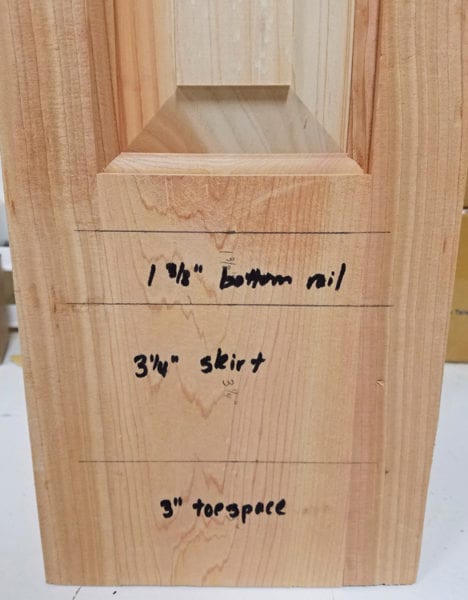
- (4-pc. Systems) The bottom brackets are located at the bottom of the Skirt.
- (3-pc. Systems) The bottom brackets are located at the bottom of the Bottom Rail.
 Note for Stair Rail Brackets: The brackets at the bottom of the stairs will have the short leg of the bracket pointing down, unlike the regular brackets. This is done because if we were to make a bracket with the leg pointing up, the tight angle is too difficult to screw to the newel post.
- Mortise the post so that the shorter leg of the angle brackets are inset and flush with the surface of the newel post (with chisel or router).
- NEXT determine spindle/baluster spacing and mark centers on the Sub-rail and Bottom Rail.
- Check local building codes for maximum spacing. Most codes dictate that the balustrade must comply with the “4-inch ball rule”.
- Spacing guidelines for the different sizes and designs of spindles and balusters can be found on each product listing at https://www.americanporch.com/product-category/balusters-spindles-wood/
- Using the maximum spacing as a guideline, determine the spacing that provides consistent look and spaces at the ends of each rail section. Note: It may be necessary to vary spacing slightly between sections, depending on length. HINT: Download a baluster spacing app on your smartphone for easy math.
- Install the Sub-rail on top of spindles/balusters by screwing the 2 ¼” screws through the sub-rail and into the spindle. For larger spindles such as 2 ½” or 3 ½”, two screws in each spindle/baluster end should be used. Many find it easiest to make a spacer block to place between spindles as they are screwed into place.

- Place the balustrade upside-down. Install Bottom Rail onto spindles in the same way as the Sub-rail.
- For the 4-pc. System, fasten skirt to underside of bottom rail with the 4 ½” screws (pre-drill for these large screws to prevent splitting the Skirt).
- Install the rail brackets onto the post/column with 1 ¼” screws. Hang the balustrade on the brackets.
- Place the Top Rail onto the sub-rail. Now fasten the brackets to the rails using the 2 ¼” screws from the bottom up.
NOTE: For the 3-pc. System, you’ll need to use the 1 ¼” screws on the Bottom Rail.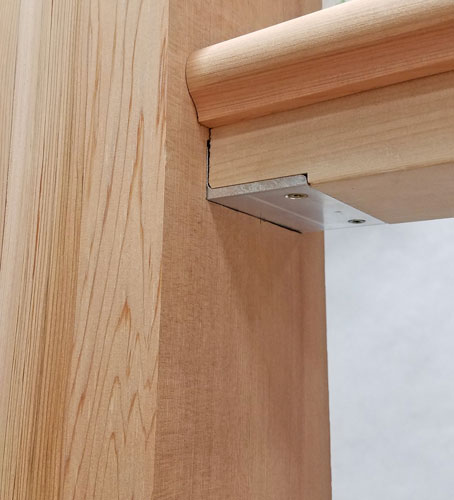
- Install support blocks on spans of 6’ and more.
- Final painting should be completed after installation.
- Now make yourself a refreshing beverage. Take pictures of your work and send with a glowing testimonial to [email protected]. Personal compliments about Adam’s good looks and magnetic personality are also acceptable.
Good job!